

Prerequisite:
(i) Visual Studio 2017 (You can use your convenient that support .NET Core)
(ii) .NET Core 2.2
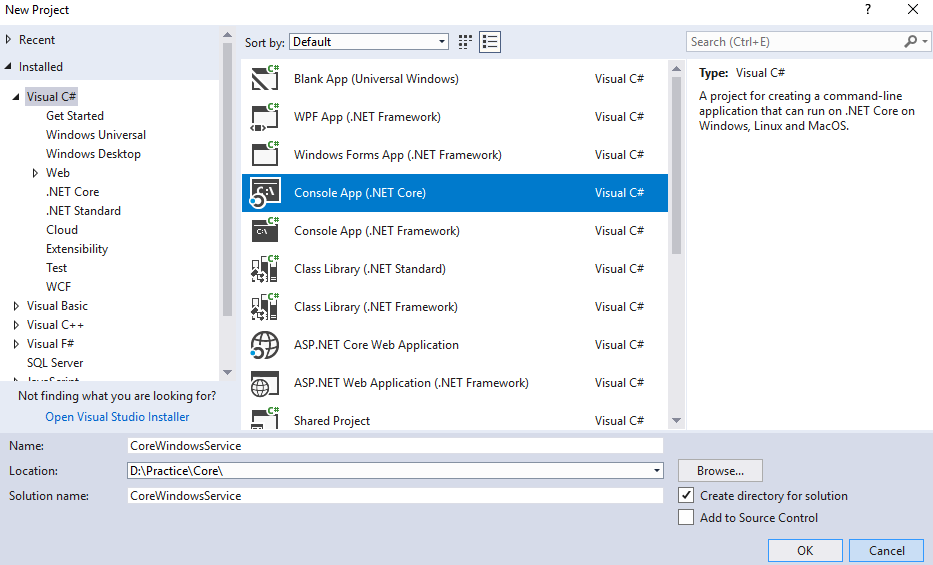
Step-1: Open Visual Studio 2017 >> File >> New Project >> ASP .NET Core Console app.
Step-2: Add the below package from Nuget Package Manager Console.

Install-Package Microsoft.Windows.Compatibility
Right Click on Project >> Properties >> Application .NET Core 2.2 Target Frame Work to .NET Core 2.2

<Project Sdk="Microsoft.NET.Sdk">
  <PropertyGroup>
   <OutputType>Exe</OutputType>
   <RuntimeIdentifier>win7-x64</RuntimeIdentifier>
   <TargetFramework>netcoreapp2.2</TargetFramework>
  </PropertyGroup>
  <ItemGroup>
   <PackageReference Include="Microsoft.Windows.Compatibility" Version="2.1.1" />
  </ItemGroup>
 </Project>
Step-4: Open the "Programm.cs" file that entry point of the console application and add the method.
class Program
   {
     static void Main(string[] args)
     {
       using (var service = new FileWriteService())
       {
         ServiceBase.Run(service);
       }
     }
   }
>> You can see we use "FileWriteService()" that enables us our stuff. Next add a
   class name FileWriteService().
public class FileWriteService : ServiceBase
   {
     public Thread Worker = null;
     public FileWriteService()
     {
       ServiceName = "MyCoreService";
     }
     protected override void OnStart(string[] args)
     {
       ThreadStart start = new ThreadStart(Working);
       Worker = new Thread(start);
       Worker.Start();
     }
     private void Working()
     {
       int nSleep = 1; // 1 minute
       try
       {
         while (true)
         {
           string filename = @"c:\MyCoreService.txt";
           using (StreamWriter writer = new StreamWriter(filename, true))
           {
             writer.WriteLine(string.Format(".NET Core Windows Service Called on " + DateTime.Now.ToString("dd /MM/yyyy hh:mm:ss tt")));
             writer.Close();
           }
           Thread.Sleep(nSleep * 60 * 1000);
         }
       }
       catch (Exception ex)
       {
         throw ex;
       }
     }
     protected override void OnStop()
     {
       if ((Worker != null) & Worker.IsAlive)
       {
         string filename = @"c:\MyCoreService.txt";
         using (StreamWriter writer = new StreamWriter(filename, true))
         {
           writer.WriteLine(string.Format(".NET Core Windows Service Stopped on " + DateTime.Now.ToString("dd /MM/yyyy hh:mm:ss tt")));
           writer.Close();
         }
         Worker.Abort();
       }
     }
   }
>> The FileWriteService class is inheritated from "ServiceBase" class
>> Threading is used in Onstart() that enables call the "Working()"
>> In Working() sleep duration is mentioned 1 minute, and it print the text into the
   specified path. Thread.Sleep(nSleep * 60 * 1000) is set as milliseconds and in each
   interval it will call the service.
>> OnStop() is used when the service is being stopped then we will get the track.
How to debug the application ?To debug the application we need to change the main() method and our member method as below.
Program.cs
static void Main(string[] args)
        {
            using (var service = new FileWriteService())
            {
                service.onDebug();
                //ServiceBase.Run(service);
            }
        }
 public void onDebug()
        {
            OnStart(null);
        }
>> Instead of calling the Service class directly we create a method in
   FileWriteService.cs(onDebug()) that call the Onstart().
How to install .NET Core Windows Service ?This is the most important step. Using the below step we can easily configure the service.
The final step is to build our code and register a service from the executable. We’ll follow the ASP.NET Core documentation to build our code and register a Windows service.
Step-1: (i) Open the Command Prompt with Run as administrator.
(ii) Navigate to the Solution Path where our application is physically stored.

(iii) Type the below command to publish the service as Release version.
dotnet publish --configuration Release
 |
| You can see after run the above command Release folder is created. |
</> sc create YourServiceName binPath= "YourpathName+ServiceName.exe"
sc create MyCoreService binPath= "D:\Practice\Core\CoreWindowsService\CoreWindowsService\bin\Release\netcoreapp2.2\win7-x64\publish\CoreWindowsService.exe"
Type the above command and hit enter you can see it shows as CreateService SUCCESS as below.

To see the service is installed or not. Open Window+R and type "Services.msc" and hit enter.
 |
| You can see our service is installed. |
sc start MyCoreService
 |
| You can see the Service is now started dynamically. |

How to Uninstall .NET Core Windows Service ?
To Uninstall windows service follow the below command.
</> sc delete YourServiceName
sc delete MyCoreService
</> The Source Code is available in Github.com/CoreProgramm/Summary
Post a Comment