

In this example we gonna see in every 1 minute interval the custom text is printed.
What is a Windows Service?Windows service is a computer program that runs in the background to execute some tasks. Some examples of Windows services are auto update of Windows, check emails, print documents, SQL Server agent, file and folder scanning and indexing and so on. If you open your Task Manager and click on Services tab, you will see hundreds of services running on your machine. You can also see the statuses of these services. Some services are running, some have paused, and some have stopped. You can start, stop, and pause a service from here by right click on the service.
To open Windows Service search "services.msc". You can see the below like pre-installed service

So Let's create Windows Service in C# and installed in the system, after installed you can find the our service in above.
Step-1: Open VS 2017 >> File New Project >> Under Windows Desktop choose WINDOWS Service


<add key="ThreadSleepTimeInMin" value="1"/>
static class Program
   {
     /// <summary>
     /// The main entry point for the application.
     /// </summary>
     static void Main()
     {
       ServiceBase[] ServicesToRun;
       ServicesToRun = new ServiceBase[]
       {
         new Service1()
       };
       ServiceBase.Run(ServicesToRun);
     }
   }
int ScheduleInterval = Convert.ToInt32(ConfigurationSettings.AppSettings["ThreadSleepTimeInMin"]);
public Thread worker = null;
protected override void OnStart(string[] args)
     {
       try
       {
         ThreadStart start = new ThreadStart(Working);
         worker = new Thread(start);
         worker.Start();
       }
       catch (Exception)
       {
         throw;
       }
     }
     public void Working()
     {
       while (true)
       {
         string path = "C:\\Sample.txt";
         using (StreamWriter writer = new StreamWriter(path, true))
         {
           writer.WriteLine(string.Format("Windows Service Called on " + DateTime.Now.ToString("dd /MM/yyyy hh:mm:ss tt")));
           writer.Close();
         }
         Thread.Sleep(ScheduleInterval * 60 * 1000);
       }
     }
Step-3: Now run the application and you can see the application is showing cannot start the service in command line. So there is a point how to debug our application.

static class Program
{
/// <summary>
/// The main entry point for the application.
/// </summary>
static void Main()
{
Service1 service = new Service1();
service.onDebug();
//ServiceBase[] ServicesToRun;
//ServicesToRun = new ServiceBase[]
//{
// new Service1()
//};
//ServiceBase.Run(ServicesToRun);
}
}
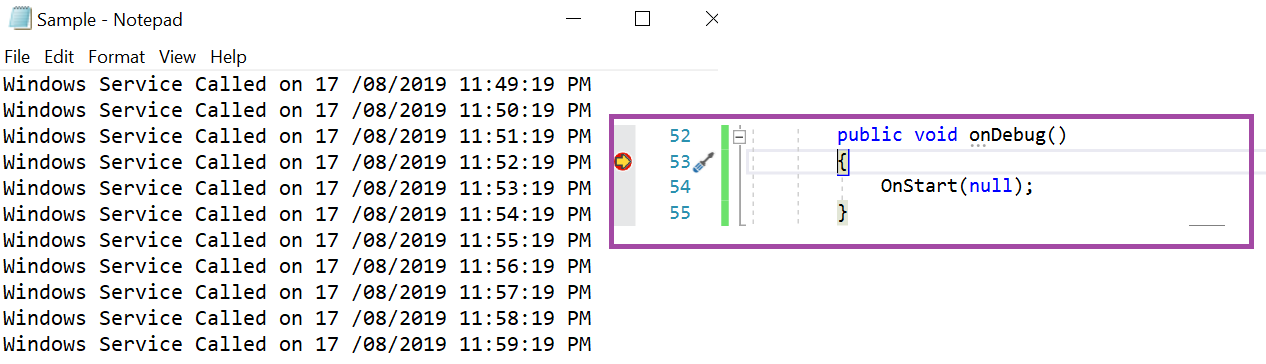
// Add the method in Service1.cs, onDebug() that call Onstart()
public void onDebug()
{
OnStart(null);
}
// OnStop() is called when the service is abort.
protected override void OnStop()
{
try
{
if ((worker != null) & worker.IsAlive)
{
worker.Abort();
}
}
catch (Exception)
{
throw;
}
}
But our motto is how to install the service and automated it run in background. So To do this follow below.
How to Add an Installer to a Windows Service
Before you can run a Windows Service, you need to install the Installer, which registers it with the Service Control Manager.

 |
| Renamed the "ServiveInstaller1" to "CoreProgramm1" |
(i) Open command Prompt as Run as administrator
(ii) Type below command in the command prompt and press ENTER.
cd C:\Windows\Microsoft.NET\Framework\v4.0.30319

(iii) Now Go to your project source folder >> bin >> Debug and copy the full path of your Windows Service exe file.

Syntax
InstallUtil.exe + Your copied path + \your service name + .exe path
InstallUtil.exe D:\JT\CoreProgramm\Blog\C#\WindowsService\WindowsService\bin\Debug\WindowsService.exe

You can see the Windows Service is installed successfully. Let's check the service on "Services.msc". To access this Press Window key + R >>Type services.msc.

 |
| You can Stop/Restart the Service at any time. |
The service will create a text file with the following text in it.

Uninstall Windows Service
Open command prompt and fire the below command and press ENTER.
Syntax
InstallUtil.exe -u + Your copied path + \your service name + .exe path
InstallUtil.exe -u D:\JT\CoreProgramm\Blog\C#\WindowsService\WindowsService\bin\Debug\WindowsService.exe
Post a Comment